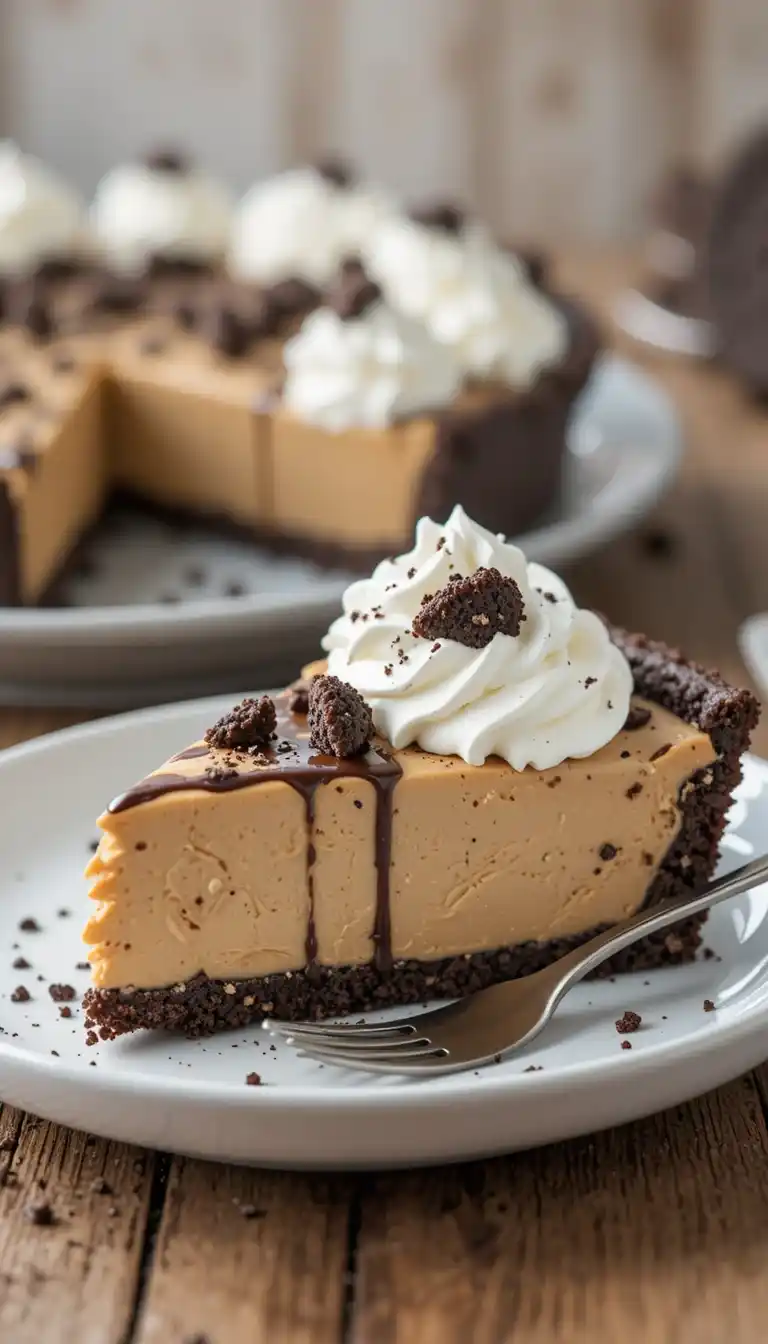
The no bake peanut butter pie with Oreo crust is the ultimate dessert for any occasion, blending rich chocolate and creamy peanut butter into one indulgent treat. This dessert stands out because it requires no oven, making it perfect for warm weather, summer parties, or quick weeknight indulgences. With a smooth, fluffy peanut butter filling layered over a crunchy Oreo crust, it captures the perfect balance of texture and flavor. Whether served at family gatherings, birthday parties, or casual get-togethers, this pie is a crowd-pleaser that is both simple to prepare and impressive to serve.
In addition, the recipe is highly adaptable. Those seeking a gluten-free or keto version can easily substitute the crust, while topping variations like peanut butter cups or chocolate drizzle elevate the dessert for a more decadent experience. Its make-ahead nature ensures that the pie can be prepared in advance, making entertaining effortless. This no bake Oreo peanut butter pie not only delights peanut butter lovers but also provides a visually appealing centerpiece for dessert tables.
Why This No Bake Peanut Butter Pie is a Must-Try
This no bake peanut butter pie with Oreo crust is more than just a dessert—it’s a versatile treat that appeals to both casual cooks and gourmet enthusiasts. First, it’s incredibly convenient, requiring minimal ingredients and no baking, which makes it an ideal option for busy home cooks or last-minute entertaining. Its combination of creamy peanut butter filling and a crunchy chocolate cookie base satisfies multiple taste preferences, especially for peanut butter lovers seeking a rich, indulgent experience.
Moreover, this pie shines as a crowd-pleaser. Its texture contrast—the smooth, fluffy filling against the crisp Oreo crust—makes every bite memorable. It’s suitable for family gatherings, summer parties, or even as a special weeknight treat. The dessert is also highly customizable, allowing variations like mini pies, keto-friendly adaptations, or nut-free options. With such flexibility, it’s a no bake Oreo peanut butter pie that suits any occasion and audience, making it a must-try recipe for anyone looking to combine simplicity, flavor, and visual appeal.
Ingredients You’ll Need
For the Oreo crust:
- 24 Oreo cookies (regular, gluten-free, or keto alternatives)
- 5 tablespoons unsalted butter, melted
For the peanut butter filling:
- 1 cup creamy peanut butter
- 8 oz cream cheese, softened
- 1 cup powdered sugar
- 1 cup heavy whipping cream, whipped
Optional toppings:
- Chopped peanut butter cups
- Extra whipped cream
- Chocolate drizzle or ganache
- Nuts or caramel for garnish
These ingredients are simple, accessible, and emphasize quick preparation without compromising flavor. By using fresh whipped cream and quality peanut butter, the pie achieves a rich, creamy texture with a delightful contrast against the crisp Oreo crust.
Equipment Needed
- 9-inch pie pan (or springform pan for easy release)
- Mixing bowls (medium and large)
- Electric mixer or hand whisk for beating cream and filling
- Spatula for folding and smoothing the filling
- Food processor or rolling pin for crushing Oreos
- Measuring cups and spoons
- Knife for slicing and serving
- Optional: piping bag for decorative whipped cream toppings
Step-by-Step Instructions
Making this no bake peanut butter pie is straightforward and rewarding.
- Making the Oreo crust: Crush the Oreos finely and mix with melted butter. Press the mixture evenly into a pie pan and chill for 10–15 minutes to set. A firm base ensures perfect slices.
- Preparing the peanut butter filling: Soften cream cheese and peanut butter, then beat with powdered sugar until smooth. Gently fold in whipped cream to create a fluffy, creamy texture.
- Assembling the pie: Pour the filling over the chilled crust, spreading evenly. Smooth the top with a spatula and refrigerate for at least four hours or overnight.
- Tips for perfection: Avoid overmixing the filling to maintain fluffiness, and ensure the crust is fully chilled before pouring in the filling to prevent sogginess.
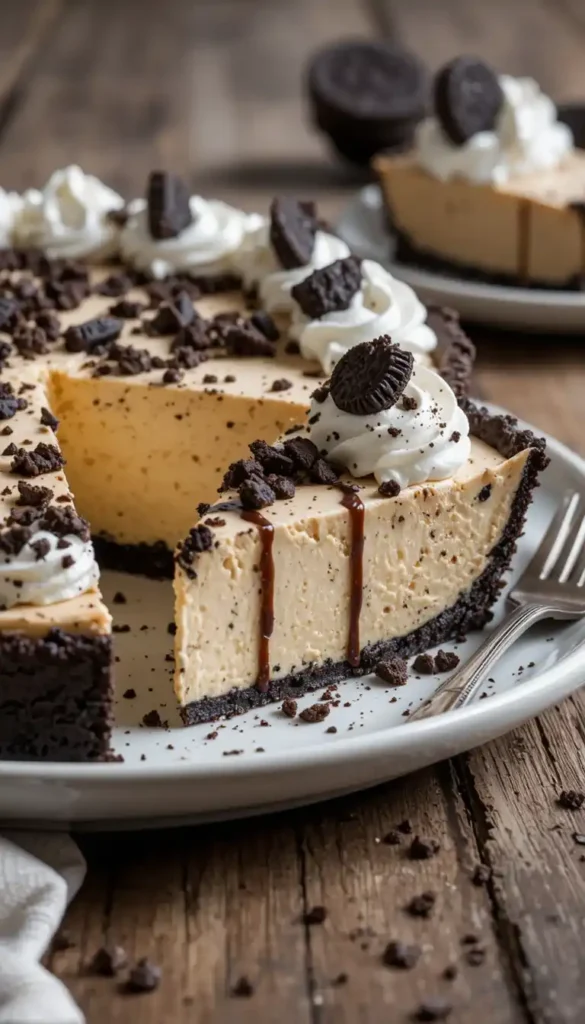
These steps create a dessert that is both indulgent and visually appealing. The no bake Oreo peanut butter pie is now ready to top with optional decorations, providing a decadent yet effortless dessert that’s perfect for any occasion.
Topping & Decorating Ideas
- Pipe whipped cream rosettes around the edges for a visually appealing presentation.
- Sprinkle crushed Oreos or chopped peanut butter cups on top for extra chocolatey crunch.
- Drizzle chocolate or caramel over the surface for a decadent touch.
- Add nuts for added texture and flavor contrast.
- For mini pies or dessert bars, cut into individual portions and garnish individually for a party-ready display.
These decoration ideas enhance the pie’s visual appeal while remaining simple enough for home cooks, making it suitable for both family-friendly occasions and elegant gatherings.
Tips for Success
- Chill the crust thoroughly before adding the filling to prevent a soggy base.
- Fold whipped cream gently into the filling to maintain a light, fluffy texture.
- Use high-quality peanut butter and fresh whipped cream for rich flavor.
- Ensure even pressing of the Oreo crust for clean slices.
- Slice with a sharp knife for perfect servings, wiping the knife between cuts if necessary.
Following these tips ensures the pie not only tastes amazing but also holds its shape beautifully, making every slice picture-perfect.
Variations to Try
- Gluten-free Oreo crust: Substitute regular Oreos with gluten-free cookies.
- Keto or low-sugar version: Use sugar-free peanut butter and low-carb Oreo alternatives.
- Mini pies or dessert bars: Perfect for portion control or party platters.
- Topping twists: Swirl in chocolate ganache, caramel, or peanut butter cups for extra indulgence.
- Nut-free option: Skip nuts and opt for decorative chocolate pieces for allergy-friendly versions.
These variations allow the dessert to cater to dietary preferences, special occasions, or creative twists, making it a flexible and universally loved treat.
Make-Ahead, Storage, and Freezing Tips
- Refrigeration: Store the pie in the refrigerator for up to 4–5 days. Cover with plastic wrap or place in an airtight container to maintain freshness and prevent odors.
- Freezing: For long-term storage, freeze the pie for up to 2 months. Wrap tightly in plastic wrap and then in aluminum foil to avoid freezer burn.
- Thawing: Thaw in the refrigerator overnight before serving to maintain the creamy texture of the peanut butter filling and crisp Oreo crust.
- Serving tips: Chill just before slicing to get clean, firm pieces. Perfect for parties or family gatherings, the make-ahead nature of this pie makes entertaining stress-free.
With these storage tips, the no bake Oreo peanut butter pie is not only easy to prepare but also convenient for planning ahead, ensuring it’s ready for any occasion.
Serving Suggestions & Presentation
- Serve chilled for the best texture and flavor.
- Pair with vanilla ice cream, coffee, or milk for a complete dessert experience.
- Garnish with extra whipped cream, crushed Oreos, or a chocolate drizzle for visual appeal.
- For parties, cut into individual slices or mini pies for easy serving and presentation.
- Consider using colorful sprinkles, chocolate shavings, or peanut butter cups for festive occasions.
These serving suggestions not only elevate the pie’s presentation but also make it an appealing centerpiece, whether for a casual family dessert or an elegant party table.
Troubleshooting Common Problems
- Crust too soft: Ensure the Oreo crust is properly chilled and the butter is fully incorporated for firmness.
- Filling too runny: Fold whipped cream gently, avoid overmixing, and use fully softened cream cheese for the right consistency.
- Pie not setting: Refrigerate for at least 4 hours or overnight; chilling ensures a firm and sliceable texture.
- Sweetness adjustment: Reduce powdered sugar if a less sweet pie is preferred; quality peanut butter balances flavor naturally.
These troubleshooting tips help home cooks achieve a perfect, restaurant-quality dessert every time, making the no bake peanut butter pie with Oreo crust foolproof.

FAQs About No Bake Peanut Butter Pie With Oreo Crust
1. Can I double the recipe?
Yes! Doubling this no bake peanut butter pie with Oreo crust is easy. Simply double all the ingredients for both the crust and the creamy peanut butter filling. Use a larger pie pan or two standard pans to ensure even layers. Make sure to chill each pie long enough for the filling to set properly. This makes it perfect for parties or large gatherings without compromising the rich, smooth texture or the crunchy Oreo crust.
2. Can I use crunchy peanut butter instead of creamy?
Absolutely! Using crunchy peanut butter adds a delightful texture to the filling, giving small peanut chunks in each bite. However, it may slightly alter the consistency, making the filling denser. To keep the pie light and fluffy, fold whipped cream gently into the filling. Crunchy peanut butter is a great variation for those who love extra texture in their no bake Oreo peanut butter pie.
3. Can this pie be made in a springform pan?
Yes, a springform pan works perfectly for this no bake peanut butter pie. It allows for easy removal and clean slices without damaging the Oreo crust. Simply press the crust firmly into the pan and chill the pie completely before releasing the sides. This method is especially useful if you want to serve the pie for special occasions, as it keeps the presentation neat and the layers intact.
4. Can I use store-bought Oreo crust?
Yes, store-bought Oreo crust is a convenient shortcut that saves time. Simply pour the peanut butter filling directly into the pre-made crust and chill according to the recipe instructions. While homemade Oreo crust gives slightly better flavor and texture, store-bought crust still creates a delicious, crowd-pleasing dessert. It’s ideal for busy cooks who want a quick, no bake peanut butter pie option.
5. How long should I chill the pie?
For the perfect no bake peanut butter pie with Oreo crust, chilling is essential. Refrigerate the pie for at least 4 hours, but overnight is ideal. Chilling allows the peanut butter filling to firm up and the Oreo crust to set, making slicing clean and easy. If frozen, thaw in the refrigerator overnight for the best texture. Proper chilling ensures a smooth, creamy filling that contrasts beautifully with the crisp Oreo base.
6. Can I make mini pies or dessert bars?
Yes! This no bake peanut butter pie recipe is very versatile. You can use small tart pans or a rectangular pan to create mini pies or bars. Follow the same steps for crust, filling, and chilling, adjusting portions accordingly. Mini pies are perfect for parties, gifting, or portion-controlled desserts. They maintain the same creamy peanut butter filling and Oreo crust combination, offering a fun twist for serving.
More Recipes You’ll Love

Conclusion
The no bake peanut butter pie with Oreo crust has earned its place as a favorite dessert because it perfectly balances indulgence, convenience, and visual appeal. The creamy peanut butter filling pairs beautifully with the crunchy chocolate Oreo crust, creating a flavor and texture contrast that delights every bite. Its versatility makes it suitable for any occasion—family gatherings, summer parties, or special celebrations.
This pie is also highly adaptable. Whether you want a gluten-free version, a keto-friendly dessert, or mini pies for portion control, it can easily be modified without compromising taste. The make-ahead nature ensures stress-free preparation, while optional toppings like chocolate drizzle, peanut butter cups, or whipped cream add an extra layer of decadence.
Dessert enthusiasts and casual cooks alike appreciate that it requires no baking yet produces a restaurant-quality dessert. For additional no-bake dessert inspiration, check out AllRecipes’ no-bake dessert collection, which offers dozens of creative, easy-to-make ideas perfect for every occasion.
Print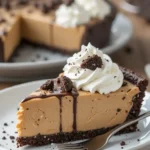
No Bake Peanut Butter Pie with Oreo Crust
- Prep Time: 15 minutes
- Chill Time: 4 hours
- Total Time: 4 hrs 15 minutes
- Yield: 8 servings
- Category: Dessert
- Method: No bake
- Cuisine: American
- Diet: Vegetarian
Description
A rich, creamy, and indulgent no bake peanut butter pie with a crunchy Oreo crust. Perfect for parties, family gatherings, or an easy dessert, this recipe is quick, make-ahead, and loved by peanut butter and chocolate lovers alike.
Ingredients
- Oreo crust: 24 Oreo cookies (regular, gluten-free, or keto), 5 tbsp unsalted butter, melted
- Peanut butter filling: 1 cup creamy peanut butter, 8 oz cream cheese (softened), 1 cup powdered sugar, 1 cup heavy whipping cream (whipped)
- Optional toppings: Chopped peanut butter cups, whipped cream, chocolate drizzle, nuts, caramel
Instructions
- Crush Oreos and mix with melted butter; press into a pie pan and chill 10–15 minutes.
- Beat peanut butter and cream cheese until smooth; fold in powdered sugar and whipped cream.
- Pour filling into chilled crust and smooth the top.
- Refrigerate for 4+ hours or overnight.
- Top with optional decorations before serving.
Notes
- Can make mini pies or bars.
- Gluten-free or keto substitutions work well.
- Chill thoroughly for clean slices.
Nutrition
- Serving Size: 1 slice
- Calories: 450kcal
- Sugar: 30g
- Sodium: 200mg
- Fat: 30g
- Saturated Fat: 12g
- Unsaturated Fat: 16g
- Carbohydrates: 35g
- Fiber: 2g
- Protein: 8g
- Cholesterol: 50mg