What Is a Butterfinger Lush Recipe?
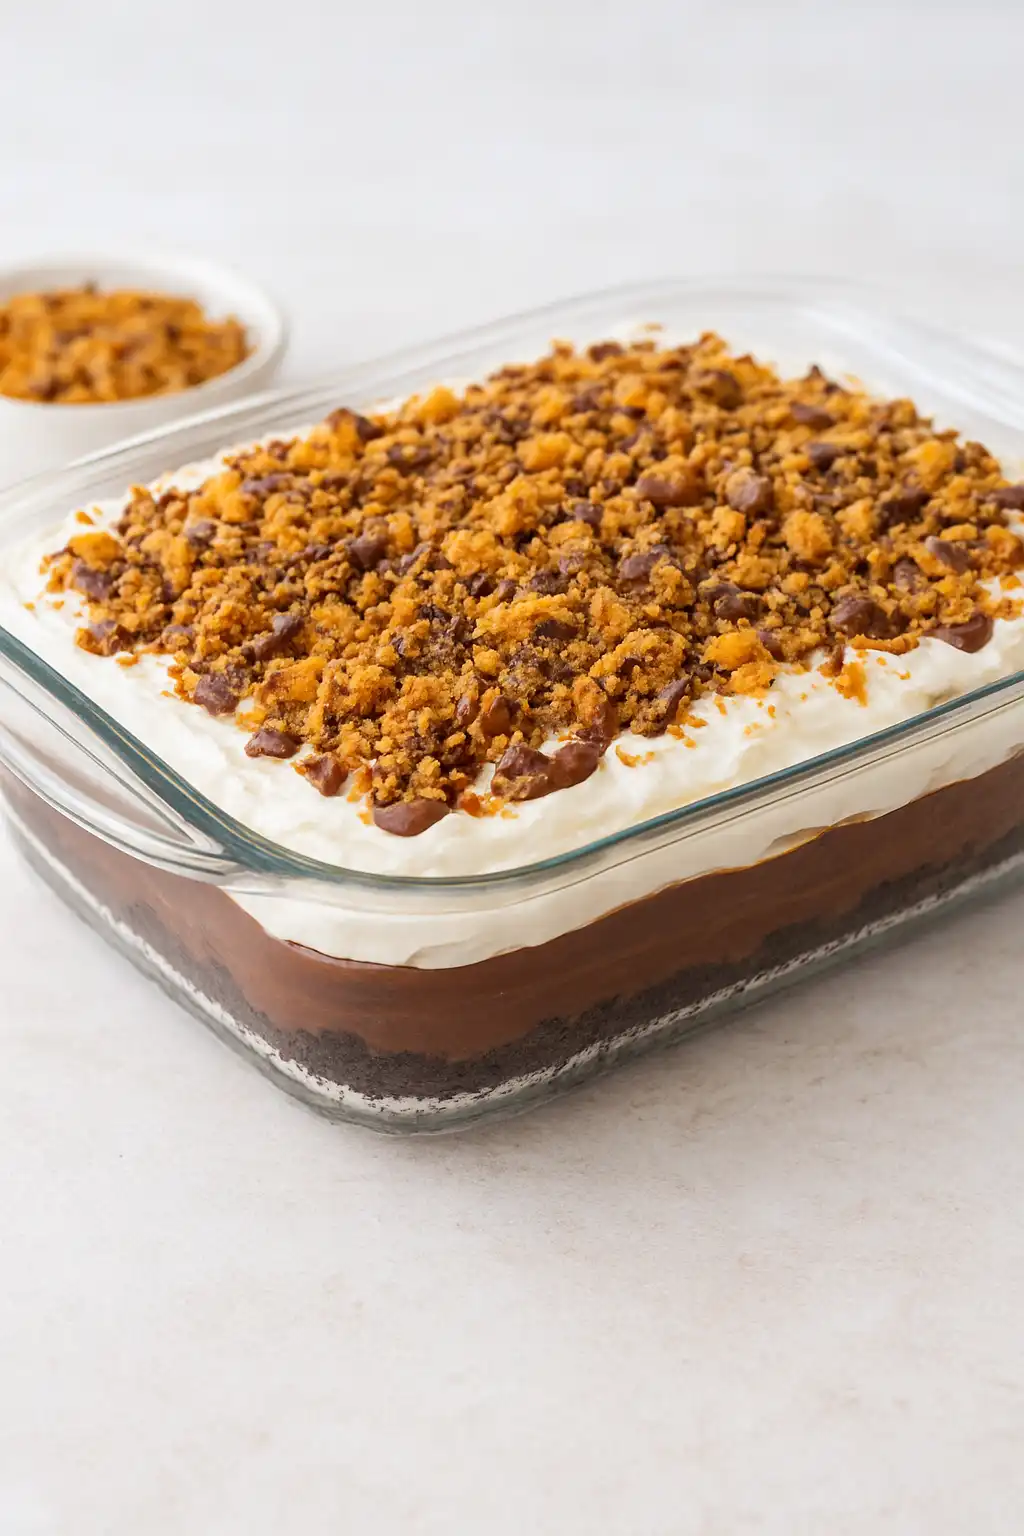
A Butterfinger Lush recipe is a layered dessert that combines the perfect mix of crunchy, creamy, and chocolaty flavors. It’s a no-bake (or semi-bake, depending on the crust) treat made with a cookie base, a creamy cream cheese mixture, layers of pudding, whipped topping, and crushed Butterfinger candy bars. Each bite delivers a delightful contrast of textures — smooth, airy cream against the crunch of candy and cookies.
Of these splendid multistacked cold layers, Butterfinger is sweetened with a peanut butter and chocolate candy infusion, giving it a nostalgic candy-bar flavor. Its great for family gatherings, potlucks, and holidays-any time you want an impressive-looking dessert but one that is surprisingly easy to make. Like all other lush or dream desserts, the Butterfinger version offers multiple cold layers that are stacked together in a refrigerator.
Butterfinger Lush requires only minimal baking time as it is the easiest type of cake to make, thus making it a beginner’s recipe. Such attractive layers will surely make this one of the top desserts on your table.
Why This Dessert Is Loved by Everyone
The Butterfinger Lush recipe has earned its reputation as a crowd favorite because it strikes the perfect balance of flavors and textures. Imagine the smoothness of a creamy pudding layered with the tang of cream cheese, topped with fluffy whipped cream, and then sprinkled generously with crunchy Butterfinger candy. It’s the kind of dessert that satisfies both chocolate lovers and peanut butter fans at the same time.
Another reason people love this dessert is its versatility. You can prepare it ahead of time, refrigerate it, and simply bring it out when it’s time to serve. This makes it perfect for birthdays, holidays, potlucks, or even casual weeknight treats. Unlike elaborate desserts that require hours of baking and decorating, this recipe is quick, straightforward, and foolproof.
The playful crunch of Butterfinger pieces adds nostalgia for many, reminding them of childhood candy bars while still feeling sophisticated enough to serve at formal gatherings. That balance of fun and indulgence is exactly why the Butterfinger Lush continues to be one of the most popular layered desserts around.
Ingredients Needed for Butterfinger Lush
Before you begin preparing your Butterfinger Lush recipe, it’s important to gather all the ingredients. The dessert is built in layers, so having everything measured and ready will make the process seamless. Let’s break it down into sections for clarity.
Crust Layer Ingredients
- 1 package of Oreo cookies (about 36 cookies), crushed into fine crumbs
- 6 tablespoons melted butter
- 2 tablespoons granulated sugar (optional, for extra sweetness)
This crust provides the base for the entire dessert. The Oreo and butter mixture creates a firm yet slightly chewy layer that pairs perfectly with the creamy fillings.
Cream Cheese Layer Ingredients
- 8 ounces cream cheese, softened
- 1 cup powdered sugar
- 1 cup whipped topping (Cool Whip or homemade whipped cream)
This layer gives a tangy, smooth, and slightly sweet element that balances out the richness of the candy and pudding.
Pudding Layer Ingredients
- 2 boxes (3.9 oz each) instant chocolate pudding mix
- 3 cups cold milk
- 1/2 cup creamy peanut butter (optional, for extra flavor)
The pudding layer is what makes the lush creamy and indulgent. Adding peanut butter enhances the Butterfinger flavor profile.
Topping and Garnish
- 2 cups whipped topping
- 6–7 Butterfinger candy bars, crushed
- Chocolate syrup drizzle (optional)
The final layer ties everything together. The whipped topping keeps it light, while the Butterfinger chunks provide that irresistible crunch.
Equipment Needed for Butterfinger Lush Recipe
While the Butterfinger Lush recipe doesn’t require fancy tools, having the right equipment makes the process smoother and ensures each layer comes out just right. Here’s what you’ll need:
- 9×13-inch baking dish – The standard size for lush desserts. A glass dish is best so you can see the beautiful layers.
- Mixing bowls – At least three medium-to-large bowls for preparing the crust, cream cheese mixture, and pudding.
- Electric hand mixer or stand mixer – Helps whip the cream cheese mixture until smooth and fluffy.
- Whisk – Essential for mixing pudding quickly and evenly.
- Rubber spatula – Perfect for folding whipped topping into mixtures without deflating it.
- Measuring cups and spoons – For accurate measurements of butter, sugar, and milk.
- Rolling pin or food processor – To crush Oreo cookies and Butterfinger bars with ease.
- Plastic wrap or foil – To cover the dessert while chilling in the refrigerator.
- Sharp knife – For cutting neat slices once the dessert has set.
👉 Optional: If you want to serve in a more elegant way, small mason jars or parfait cups can be used instead of a large dish. This turns the dessert into a single-serve treat that’s perfect for parties.
Step-by-Step Instructions to Make Butterfinger Lush
Creating the perfect Butterfinger Lush recipe involves careful layering. Each step builds upon the last, resulting in a stunning, multi-layered dessert.
Preparing the Crust
- Crush the Oreo cookies using a food processor or by placing them in a sealed plastic bag and rolling with a rolling pin.
- Mix the crumbs with melted butter (and sugar, if desired).
- Press the mixture firmly into the bottom of a 9×13-inch baking dish.
- Chill in the refrigerator for at least 20 minutes to set before adding the next layer.
Making the Cream Cheese Mixture
- Beat softened cream cheese with powdered sugar until smooth and creamy.
- Gently fold in whipped topping until fully incorporated.
- Spread evenly over the chilled crust.
Mixing the Pudding Layer
- In a large bowl, whisk instant pudding mix with cold milk until thickened.
- For a stronger peanut butter note, blend in 1/2 cup creamy peanut butter.
- Spread pudding mixture evenly over the cream cheese layer.
Assembling the Lush
- Spread an even layer of whipped topping over the pudding.
- Sprinkle generously with crushed Butterfinger candy bars.
- For an extra touch, drizzle with chocolate syrup before chilling.
- Refrigerate for at least 4 hours (overnight is best) before serving.
This chilling time allows all the layers to set beautifully, making slicing much easier.
Tips for Perfect Butterfinger Lush Recipe
Making a Butterfinger Lush recipe might seem straightforward, but a few smart tips can take your dessert from good to unforgettable. Because this is a layered dessert, balance and technique matter just as much as flavor.
- Use room-temperature cream cheese – If your cream cheese is too cold, it won’t blend smoothly with the sugar and whipped topping. Leaving it out for 20–30 minutes softens it perfectly.
- Crush Butterfingers right before use – Candy bars can get sticky if left crushed for too long. For maximum crunch, crush them just before sprinkling.
- Whip the cream cheese mixture well – This layer should be fluffy and light, not dense. Whipping properly makes the texture cloud-like.
- Chill overnight for best results – While 4 hours is enough, letting the dessert rest overnight allows flavors to meld and layers to firm up.
- Slice with a sharp knife – Run the knife under hot water, wipe it dry, and then slice for neat, clean squares.
- Don’t overmix pudding – Over-whisking can make it runny. Mix until thickened and smooth, then stop.
By following these tips, you’ll avoid common mishaps like watery pudding, crumbly crusts, or uneven layers. The goal is a dessert that looks as good as it tastes, with each forkful delivering a perfect bite of cookie crust, creamy filling, and crunchy candy.
Variations of Butterfinger Lush You Can Try
The beauty of the Butterfinger Lush recipe lies in its adaptability. While the classic version is always a hit, you can tweak it for different occasions, dietary needs, or flavor preferences. Here are some creative variations:
Chocolate Lovers’ Version
Swap the standard pudding with double chocolate pudding or chocolate fudge pudding. You can even add a drizzle of hot fudge between layers. This makes the dessert intensely rich and perfect for true chocoholics.
Peanut Butter Twist
Enhance the peanut butter flavor by adding peanut butter pudding instead of chocolate, or by folding extra peanut butter into the cream cheese mixture. You can also sprinkle chopped peanuts for added crunch.
No-Bake Summer Version
Skip baking the crust and use graham crackers or Nutter Butter cookies instead of Oreos. This keeps the dessert light and refreshing for hot days while still giving you the same layered effect.
Holiday Special Edition
Incorporate seasonal flavors like peppermint bark at Christmas or pastel sprinkles at Easter. Crushed Butterfinger Eggs (available during spring) also make a festive touch.
Gluten-Free or Low-Sugar Option
Swap Oreos with gluten-free sandwich cookies and use sugar-free pudding and whipped topping. This way, you can enjoy the lush without compromising dietary restrictions.
With these variations, your Butterfinger Lush can transform into a dessert suited for any season, holiday, or craving, keeping it fresh and exciting every time you make it.
Storage and Make-Ahead Instructions
One of the best parts about a Butterfinger Lush recipe is how well it can be made ahead of time. Since the dessert requires refrigeration to firm up, it naturally doubles as a convenient make-ahead treat for parties and gatherings.
- Refrigeration: Cover the dessert tightly with plastic wrap or an airtight lid and refrigerate. It will stay fresh for up to 3–4 days. The flavors even improve as the layers have more time to settle.
- Freezing: While freezing isn’t ideal (the texture of pudding and whipped topping can change), it’s possible to freeze for up to 1 month if absolutely necessary. Wrap the pan tightly in plastic wrap, then foil, and thaw overnight in the refrigerator before serving.
- Make-Ahead Tip: If preparing a day or two in advance, crush Butterfingers right before serving. Candy bars can lose their crunch if exposed to too much moisture in the fridge.
This flexibility makes it a dream dessert for busy hosts. You can prepare everything the night before, focus on your main meal the next day, and then simply pull the lush out of the fridge right before serving. No last-minute stress, just pure enjoyment.
Common Mistakes to Avoid
Even though the Butterfinger Lush recipe is simple, a few common mistakes can affect the final result:
- Using warm pudding: Always let your pudding thicken properly before layering, or it will seep into other layers.
- Not chilling long enough: Rushing the chilling process leads to sloppy, uneven slices.
- Overmixing whipped topping: Folding gently keeps it airy; overmixing can deflate it.
- Too much butter in crust: Excess butter makes the crust greasy and hard to cut.
- Skipping the foil/plastic wrap in storage: Without proper covering, the dessert can dry out or absorb fridge odors.
By avoiding these pitfalls, your lush will come out picture-perfect every time.
Expert Tips for Layered Desserts
Professional bakers and home cooks alike recommend these pro-level tricks for making lush desserts stand out:
- Use a glass baking dish – Not only can you admire the layers, but it also makes serving easier.
- Chill each layer briefly before adding the next – A 10–15 minute chill ensures layers don’t blend into one another.
- Add texture – Mix in a handful of chopped peanuts, pretzels, or caramel drizzle to elevate flavor complexity.
- Use high-quality candy – Fresh Butterfinger bars add the crunch and flavor you need. Older bars can taste stale.
- Serve cold, not frozen – The contrast of chilled creaminess and crunchy candy is what makes this dessert shine.
These small adjustments can elevate your lush from a fun potluck dessert to something that looks professionally made.
Butterfinger Lush vs. Other Lush Recipes
There are many types of lush desserts out there — Oreo Lush, Lemon Lush, Pistachio Lush — but what makes the Butterfinger Lush recipe so unique is its candy-bar-inspired flavor.
- Oreo Lush focuses purely on chocolate and cream layers.
- Lemon Lush is tangy, refreshing, and citrus-forward.
- Pistachio Lush is nutty and pastel-green, often used in spring.
- Butterfinger Lush, however, combines chocolate, peanut butter, cream cheese, and candy crunch into one unforgettable bite.
It’s the lush with the most personality — playful, indulgent, and nostalgic. That’s why many people consider it their go-to lush dessert for parties.

FAQs
1. Can I make Butterfinger Lush ahead of time?
Yes! The Butterfinger Lush recipe is actually better when made in advance. Preparing it the night before allows the layers to set and flavors to blend. Just be sure to add the crushed Butterfinger topping right before serving to maintain its crunch.
2. What’s the best way to crush Butterfingers for this recipe?
The easiest method is placing the candy bars in a zip-top bag and gently smashing them with a rolling pin. For finer pieces, use a food processor. A mix of chunks and crumbs gives the best texture.
3. Can I use homemade whipped cream instead of Cool Whip?
Absolutely. Homemade whipped cream makes the dessert taste fresher and richer. Just whip heavy cream with a little powdered sugar until soft peaks form. Keep in mind, though, that homemade whipped cream doesn’t stay stable as long as Cool Whip, so it’s best eaten within 1–2 days.
4. Is there a way to make this dessert lighter?
Yes, you can lighten it up by using low-fat cream cheese, sugar-free pudding mix, skim milk, and light whipped topping. While it won’t be identical in richness, it will still deliver the signature Butterfinger crunch and creaminess.
5. How long does Butterfinger Lush last in the refrigerator?
When properly covered, it lasts 3–4 days in the fridge. After that, the crust can become soggy and the whipped topping may lose volume. For the best taste and texture, enjoy it within the first two days.
6. Can I serve Butterfinger Lush in individual portions?
Yes! Instead of a 9×13 dish, you can layer the dessert into small cups, jars, or ramekins. This makes serving easier at parties and adds a stylish, modern presentation.
Explore More Dessert Posts
https://dailytastebites.com/apple-pie-puff-pastry-bake/
https://dailytastebites.com/chocolate-depression-cake-recipe/
https://dailytastebites.com/can-i-make-butter-swim-biscuits-with-regular-milk/
https://dailytastebites.com/no-bake-pineapple-dream-dessert-recipe/
https://dailytastebites.com/no-bake-key-lime-pie-recipe/
Conclusion
The Butterfinger Lush recipe is the ultimate no-fuss, crowd-pleasing dessert that brings together the best of both worlds — the nostalgic crunch of Butterfinger candy bars and the creamy indulgence of layered puddings and cream cheese. Whether you’re preparing it for a family gathering, a potluck, or just a special treat at home, this dessert never fails to impress.
Its versatility allows endless variations, from chocolate-loaded versions to peanut butter twists, making it suitable for any occasion. Best of all, it’s simple enough for beginners but impressive enough to make guests think you spent hours in the kitchen.
So next time you need a dessert that’s guaranteed to disappear fast, turn to this Butterfinger Lush recipe. With its irresistible layers, it’s not just a treat — it’s a showstopper.
For more inspiration on lush desserts and their variations, check out Taste of Home’s dessert collections.
Print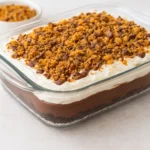
Butterfinger Lush Recipe
- Prep Time: 25 minutes
- Cook Time: 0 minutes (no-bake recipe)
- Total Time: 4 hours 25 minutes
- Yield: 15 servings (9×13 pan) 1x
- Category: Dessert
- Method: No-Bake / Chilled
- Cuisine: American
- Diet: Vegetarian
Description
This Butterfinger Lush recipe is a layered no-bake dessert with an Oreo crust, creamy cheesecake filling, rich pudding, fluffy whipped topping, and crushed Butterfingers for a crunchy finish. It’s easy, make-ahead friendly, and guaranteed to be the star of any dessert table.
Ingredients
Crust Layer
- 36 Oreo cookies, crushed
- 6 tbsp melted butter
- 2 tbsp sugar (optional)
Cream Cheese Layer
- 8 oz cream cheese, softened
- 1 cup powdered sugar
- 1 cup whipped topping
Pudding Layer
- 2 boxes (3.9 oz) instant chocolate pudding
- 3 cups cold milk
- ½ cup peanut butter (optional)
Topping
- 2 cups whipped topping
- 6–7 Butterfinger bars, crushed
- Chocolate syrup (optional)
Instructions
- Prepare crust: Mix crushed Oreos with butter and press into baking dish. Chill 20 minutes.
- Cream cheese layer: Beat cream cheese + sugar, fold in whipped topping, spread over crust.
- Pudding layer: Whisk pudding mix + milk (+ peanut butter, optional). Spread over cream cheese layer.
- Topping: Spread whipped topping, sprinkle crushed Butterfingers, drizzle syrup if desired.
- Chill: Refrigerate at least 4 hours or overnight. Slice and serve cold.
Notes
- Chill for 4–6 hours (best overnight).
- Can be made 1–2 days ahead.
- Try Oreo or graham cracker crusts.
- Use Cool Whip or homemade whipped cream.
- Store in fridge, enjoy within 3–4 days.
- For neat slices: hot knife, wipe clean each cut.
Nutrition
- Calories: 420 kcal
- Sugar: 30g
- Fat: 26g
- Saturated Fat: 12g
- Carbohydrates: 42g
- Protein: 5g
- Cholesterol: 320mg