The dill pickle bread recipe is a must-try for those who embrace richly flavored experimentation. This loaf combines the tang of the pickles with dill to create a truly remarkable treat. Soft, aromatic, and somewhat acidic, it bears little resemblance to the plain, everyday loaves that usually grace the breadbasket.
For pickle lovers especially, nothing short of this bread is worth fancy. However, even those who are not devoted pickles enthusiasts often find it hard to resist its unusual flavor combination. Dill pickle bread, when not savored solo, may combine well with soups, sandwiches, and charcuteries.
One may find the idea of having a bit of dill pickle in bread outlandish, but by the time you taste it, you would easily guess why it is getting so famous on home cooking websites and so forth. It is a bread that allows for almost infinite customization-just perfect.
Why Dill Pickle Bread is So Unique
What sets the dill pickle bread recipe apart from other savory breads is its intriguing balance of flavors. Pickles bring a natural tanginess, saltiness, and crunch, while dill adds an herbal note that enhances the entire loaf. Unlike sweet breads that rely on sugar, this bread leans on savory and zesty elements that make every slice interesting.
Another reason dill pickle bread is so unique is its versatility. It can be enjoyed warm from the oven, sliced for sandwiches, or even toasted with melted cheese. Its flavor profile is unlike any standard loaf, making it ideal for those who want to elevate their baking game.
Ingredients Needed for Dill Pickle Bread Recipe
When preparing the dill pickle bread recipe, having the right ingredients is the foundation of success. Each component plays a crucial role in creating a loaf that’s flavorful, moist, and aromatic. In this section, we’ll break down the essentials with subheadings to give you a complete understanding of what goes into this unique bread.
1. Core Dry Ingredients
The backbone of any bread recipe lies in its dry components, which provide structure and texture.
- All-Purpose Flour – This is the most commonly used flour for bread-making. It provides the gluten structure that gives the bread its chewiness and shape. You can also use bread flour for a slightly denser and more elastic crumb.
- Sugar – A small amount of sugar helps activate the yeast and balances the tanginess of pickles. Don’t worry—it won’t make your bread sweet, but it will enhance flavor and aid in browning.
- Salt – Essential for flavor balance, salt also controls yeast activity to prevent over-proofing. In dill pickle bread, it harmonizes the sharpness of pickles with the richness of flour.
2. Yeast – The Rising Agent
- Active Dry Yeast – This is the go-to yeast for the dill pickle bread recipe. It requires activation in warm liquid before mixing into the dough.
- Instant Yeast (Optional Alternative) – If you’re short on time, instant yeast can be mixed directly into dry ingredients, skipping the proofing step.
Yeast gives the bread its airy texture, creating a light and soft crumb instead of a dense, heavy loaf.
3. Liquid Ingredients
What makes this recipe truly unique is the use of pickle juice as part of the liquid base.
- Warm Pickle Juice – Instead of just water or milk, warm pickle juice infuses the dough with tangy flavor right from the start. It also activates the yeast when slightly warmed.
- Water or Milk (Optional Mix) – Some bakers like to use half pickle juice and half milk for a softer, creamier bread.
The liquid ingredients don’t just hydrate the flour—they infuse flavor, activate yeast, and impact the bread’s texture.
4. The Star Ingredient – Dill Pickles
- Chopped Dill Pickles – The hero of the recipe. These little chunks add bursts of tangy, crunchy goodness throughout the loaf. The size of your chop matters—finely diced pickles will give subtle flavor, while larger chunks create bold bites.
- Pickle Type – Dill pickles work best, but spicy, garlic, or bread-and-butter pickles can give the bread an entirely new personality.
Pickles are what elevate this recipe from ordinary to extraordinary.
5. Flavor Enhancers
- Dill Weed (Fresh or Dried) – Fresh dill provides vibrant, aromatic flavor that stands out, while dried dill offers a milder, more evenly distributed taste. Both work wonderfully.
- Butter or Oil – Adds richness and tenderness to the crumb. Butter creates a richer taste, while oil results in slightly more moisture.
- Optional Spices – Garlic powder, onion powder, or caraway seeds can be added for extra depth.
These enhancers make sure the bread isn’t just about pickles—it’s about layers of flavor that delight the taste buds.
6. Optional Add-Ins
The dill pickle bread recipe is highly adaptable. Depending on your mood, you can add extra ingredients to personalize your loaf:
- Shredded Cheese – Cheddar, mozzarella, or pepper jack for gooey richness.
- Jalapeños or Chili Flakes – To give your bread a spicy kick.
- Sun-dried Tomatoes – For a sweet-savory contrast.
- Seeds – Sesame, caraway, or poppy seeds add crunch and nuttiness.
These additions allow you to customize the recipe for family dinners, parties, or even gourmet experiments.

Step-by-Step Instructions for Dill Pickle Bread Recipe
Making bread may feel intimidating for beginners, but the dill pickle bread recipe is approachable, fun, and rewarding. By breaking the process into simple, detailed steps, you’ll learn not only how to bake it but also why each step matters. This way, you can master the recipe and avoid common pitfalls.
1. Preparing the Yeast Starter
Before you jump into mixing everything together, you need to “wake up” the yeast.
- Warm the Pickle Juice: Heat about 1 cup of pickle juice until it reaches 105–110°F. Too cold, and the yeast won’t activate; too hot, and you risk killing it.
- Add Sugar and Yeast: Stir in 1 teaspoon of sugar (food for the yeast) and 2 ¼ teaspoons of active dry yeast. Let it sit for 5–10 minutes.
- Watch for Froth: You’ll know it’s ready when bubbles and foam appear. If nothing happens, the yeast may be expired—start again with fresh yeast.
Pro Tip: Always test yeast before adding other ingredients. This step saves you from wasting flour and time if the yeast is dead.
2. Mixing the Base Dough
Now that the yeast is active, you can begin creating the base of your bread.
- Add Fats and Flavor: Pour in 2 tablespoons of melted butter or oil, a teaspoon of salt, and a tablespoon of fresh dill weed. Stir gently.
- Incorporate Flour: Add 3 cups of all-purpose flour gradually, one cup at a time. This ensures smooth blending and prevents lumps.
- Form a Dough Ball: The dough should be soft and pliable but not sticky. If it clings to your hands, sprinkle in an extra tablespoon of flour.
Pro Tip: Don’t dump flour all at once—gradual mixing gives you more control over texture.
3. Kneading the Dough
Kneading develops gluten, which gives bread its structure and chewiness.
- Flour Your Surface: Lightly dust your countertop or board with flour.
- Work the Dough: Using the heel of your hand, push the dough away, fold it back, and rotate. Repeat this rhythm for 8–10 minutes.
- Check for Elasticity: When the dough bounces back after being gently pressed, it’s ready.
Pro Tip: If kneading feels tiring, use a stand mixer with a dough hook for 6–7 minutes.
4. First Rise (Proofing)
This step is crucial for developing flavor and lightness in your bread.
- Grease a Bowl: Coat a large bowl with oil or non-stick spray.
- Place Dough Inside: Roll the dough around to coat lightly in oil. This prevents drying out.
- Cover and Rest: Use a clean towel or plastic wrap, and let it rise in a warm spot for 1–1.5 hours, or until it doubles in size.
Pro Tip: If your kitchen is cold, place the bowl in an oven with just the light on. The gentle warmth helps the yeast thrive.
5. Adding Dill Pickles and Optional Fillings
This is where the bread earns its name and unique taste.
- Punch Down the Dough: Gently press down to release air bubbles.
- Fold in Chopped Pickles: Sprinkle about 1 cup of finely chopped dill pickles onto the dough. Fold them in by hand until evenly distributed.
- Add Extra Flavors: If you’re using cheese, jalapeños, or garlic, this is the time to incorporate them.
Pro Tip: Pat pickles dry with a paper towel before adding. Too much liquid can make the bread soggy.
6. Shaping the Dough
Once the mix-ins are added, it’s time to shape your loaf.
- Traditional Loaf Pan: Place the dough into a greased 9×5-inch pan for a classic sandwich-style loaf.
- Rustic Round Loaf: Shape into a boule (round ball) and place on a baking sheet lined with parchment.
- Mini Loaves or Rolls: Divide the dough into smaller portions and bake in muffin tins or mini pans for individual servings.
Pro Tip: If making rolls, reduce baking time to 18–20 minutes.
7. Second Rise (Final Proofing)
Bread needs a second rise for proper structure.
- Cover Again: Drape a towel over the loaf.
- Wait Patiently: Let it rise for 30–40 minutes, or until it has puffed up nicely.
- Test for Readiness: Gently press your finger into the dough. If it springs back slowly, it’s ready for baking.
Pro Tip: Don’t over-proof—if the dough rises too much, it can collapse during baking.
8. Baking the Bread
Now comes the most rewarding part.
- Preheat the Oven: Set it to 375°F (190°C).
- Bake the Loaf: Place the bread in the oven and bake for 30–35 minutes, or until golden brown.
- Check for Doneness: Tap the bottom of the loaf—if it sounds hollow, it’s done. Alternatively, use a thermometer; the internal temp should be 190°F (88°C).
Pro Tip: For a shiny crust, brush the top with melted butter right after baking.
9. Cooling the Bread
It’s tempting to slice into warm bread immediately, but patience pays off.
- Cool on Wire Rack: Remove bread from the pan and place on a rack. This prevents sogginess.
- Wait 20–30 Minutes: Letting it cool ensures clean slices and prevents gummy texture inside.
- Slice and Serve: Use a serrated bread knife for neat slices.
Pro Tip: If you love warm bread, slice after 15 minutes and enjoy with butter, but keep in mind it may be a bit softer inside.
Tips for Perfect Dill Pickle Bread
Baking bread is often described as both an art and a science, and that’s especially true when it comes to a dill pickle bread recipe. The right balance of ingredients, technique, and patience makes the difference between a dense, uneven loaf and one that’s golden, fluffy, and bursting with tangy pickle flavor. Below are some expanded tips that will guide you toward bread-baking success.
Measure Accurately
Bread dough is sensitive to even small changes in ingredient amounts. If you add too much flour, the loaf may come out dry and heavy. Too little flour, on the other hand, leaves the dough sticky and hard to work with. For best results, spoon the flour into your measuring cup, then level it off instead of scooping straight from the bag. Liquids like pickle juice should be measured in a clear measuring cup at eye level. For serious bakers, a kitchen scale is the most reliable way to achieve accuracy.
Use Warm, Not Hot, Pickle Juice
The liquid in this recipe isn’t just for flavor—it activates the yeast. Yeast thrives in warmth but dies when exposed to excessive heat. The ideal temperature for your pickle juice is between 105°F and 110°F. If you don’t have a thermometer, test it with your finger—it should feel warm, like bath water, but never hot or boiling. This small detail ensures that your dough rises properly and develops the airy texture you want.
Don’t Skip the First Rise
Rising time is essential for building structure and flavor. During the first rise, yeast ferments the sugars in the dough, releasing carbon dioxide that helps it expand. Skipping or shortening this step results in a flat, dense loaf with underdeveloped flavor. For the best outcome, allow the dough to rise until it has doubled in size, usually around one to one and a half hours depending on your kitchen’s temperature.
Fold in Pickles Gently
Chopped pickles are what make this bread special, but they need to be incorporated with care. Add them after the first rise, folding gently so that the dough doesn’t collapse. Over-mixing can damage the dough’s gluten structure, making the loaf soggy or uneven. The goal is to distribute the pickles evenly without deflating the dough.
Cool Completely Before Slicing
It can be tempting to cut into freshly baked bread right away, but patience pays off. Hot bread is still releasing steam, and cutting too early can result in gummy slices. Allow the loaf to cool completely on a wire rack before slicing. This not only gives you clean, even slices but also allows the flavors—including the tang of the pickles and the herbs—to fully develop.
Variations of Dill Pickle Bread Recipe
The classic version is delightful, but you can experiment with fun variations of the dill pickle bread recipe:
Dill Pickle and Cheese Bread
Adding sharp cheddar or mozzarella enhances the richness of the loaf. The gooey cheese pairs beautifully with the briny pickles, making it a fantastic side dish for soups and stews.
Spicy Dill Pickle Bread
For heat lovers, incorporate diced jalapeños or red chili flakes into the dough. The spice balances the tang of the pickles and creates a bold, exciting flavor.
Gluten-Free Dill Pickle Bread
By using a gluten-free flour blend, you can make this recipe suitable for those with dietary restrictions. Just make sure to add a binding agent like xanthan gum to maintain structure.
These variations ensure that no matter your taste preferences or dietary needs, there’s a version of this bread that works for you.
Serving Suggestions
The beauty of the dill pickle bread recipe is how versatile it is when served. This bread isn’t just a side; it can easily become the star of the meal depending on how you pair it.
- As a Side with Soups & Stews
The tangy notes of the bread complement creamy soups like potato, tomato basil, or broccoli cheddar. Its dense yet fluffy texture makes it ideal for dipping. - For Sandwiches
Slice it thickly and use it as sandwich bread. Imagine a turkey and Swiss sandwich layered on dill pickle bread—it adds a punch of flavor without needing extra condiments. - Toasted with Spreads
Toasted slices with butter, garlic butter, or even cream cheese make an excellent snack. A smear of herbed cream cheese turns it into a savory treat. - On Charcuterie Boards
Add sliced dill pickle bread alongside cheeses, olives, meats, and mustards. Its tang cuts through the richness of cured meats, balancing the flavors. - As Party Appetizers
Cut the bread into cubes and serve with spinach dip or hummus. Guests will love the unique taste, and it’s a great conversation starter.
The best part? This bread doesn’t need much embellishment—it’s flavorful enough to stand on its own.
Storing and Freezing Dill Pickle Bread Recipe
One of the most important parts of enjoying homemade bread is knowing how to store it properly. Since the dill pickle bread recipe contains ingredients like chopped pickles and pickle juice, the loaf tends to have a slightly higher moisture content than traditional breads. This moisture is great for keeping the bread soft and flavorful, but it also means it can spoil faster if not stored correctly. With the right techniques, however, you can enjoy fresh-tasting pickle bread for days—or even weeks if frozen.
Storing at Room Temperature
If you plan to eat your dill pickle bread within 2–3 days, room temperature storage works best.
- Cool Completely: Before storing, let the bread cool fully on a wire rack. Warm bread releases steam, which can lead to sogginess or mold if trapped inside a bag or container.
- Wrap Properly: Use plastic wrap, aluminum foil, or an airtight bread bag to keep the loaf soft and prevent it from drying out.
- Avoid Refrigeration: While the fridge might seem like a good option, it actually makes bread stale faster due to the cool air. Stick with room temperature storage unless you live in a very humid climate.
Freezing Dill Pickle Bread
If you’ve baked more than you can eat in a few days, freezing is the perfect solution. The dill pickle bread recipe freezes well without losing its texture or flavor.
- Slice Before Freezing: Cut the loaf into slices so you can remove only what you need later. This makes thawing quicker and prevents waste.
- Double Wrap: Wrap slices or the whole loaf tightly in plastic wrap, then place it in a freezer-safe bag or airtight container. This prevents freezer burn and locks in freshness.
- Label and Date: Homemade bread is best enjoyed within 2–3 months of freezing. Adding a date helps you keep track of freshness.
Thawing and Reheating
When you’re ready to enjoy your frozen dill pickle bread, proper thawing ensures it tastes just as good as freshly baked.
- Room Temperature Thawing: Simply leave slices or the loaf on the counter for 1–2 hours.
- Quick Thaw Option: Pop frozen slices directly into the toaster or warm them in the oven at 300°F (150°C) for 10 minutes. This not only thaws the bread but also refreshes its texture.
Health Benefits of Dill Pickle Bread Recipe
While the dill pickle bread recipe is often celebrated for its unique tangy flavor and versatility, it also carries some surprising health benefits. From aiding digestion to providing essential nutrients, this savory bread can be a wholesome addition to your diet when enjoyed in moderation. Let’s explore the health advantages that make dill pickle bread more than just a tasty treat.
Probiotic Potential from Pickles
Pickles, especially those that are naturally fermented, contain probiotics—beneficial bacteria that support gut health. When incorporated into a dill pickle bread recipe, some of these benefits may carry over, particularly in terms of flavor and digestive support. Probiotics help balance gut bacteria, which can improve digestion, nutrient absorption, and even immune function.
Rich in Antioxidants and Nutrients
Dill and cucumbers are both nutrient-rich ingredients. Dill contains antioxidants, vitamin C, and flavonoids, which help combat free radicals and reduce inflammation. Cucumbers used in pickles add hydration, potassium, and small amounts of fiber. While baking reduces some nutrient potency, these ingredients still contribute subtle health benefits.
Hydration and Electrolyte Support
Because pickles are brined in a salt solution, they contain sodium, an essential electrolyte. Paired with potassium from cucumbers, this balance can support hydration and muscle function—especially useful after exercise. Eating a slice of dill pickle bread alongside a meal could provide a small electrolyte boost.
Fiber Content for Digestion
The dill pickle bread recipe often uses flour varieties that contain dietary fiber, which supports digestive health and helps maintain stable blood sugar levels. Adding whole wheat flour instead of all-purpose flour can further increase the fiber content, making the bread more filling and beneficial for gut health.
Heart and Bone Health
The dill herb isn’t just for flavor—it also contains trace amounts of calcium, magnesium, and iron. These minerals contribute to stronger bones and better cardiovascular health. Though consumed in small amounts through bread, they’re still valuable additions to your diet.
Portion Control and Balance
It’s worth noting that the bread’s sodium content can be high due to pickles and pickle juice. For individuals monitoring their salt intake, enjoying smaller portions or pairing the bread with fresh vegetables and lean proteins helps balance the meal. Like all bread, it’s best enjoyed as part of a balanced diet.
Nutritional Information
While exact values depend on your chosen add-ins, here’s an approximate breakdown per slice (based on a standard loaf cut into 12 slices):
| Nutrient | Amount (per slice) |
|---|---|
| Calories | 160–180 kcal |
| Carbohydrates | 28–30 g |
| Protein | 5–6 g |
| Fat | 3–4 g |
| Saturated Fat | 1–1.5 g |
| Fiber | 1–2 g |
| Sodium | 270–300 mg |
| Sugar | 2–3 g |
| Cholesterol | 5–10 mg |
Adding cheese or butter will raise fat and calorie content, while extra veggies like jalapeños or herbs add negligible calories but boost nutrition.
This bread is relatively moderate in calories compared to sweet breads, making it a balanced option for savory cravings.
Common Mistakes to Avoid When Making Dill Pickle Bread Recipe
Even experienced bakers run into challenges when trying out a new recipe, and the dill pickle bread recipe is no exception. Because this bread uses unique ingredients like pickle juice and chopped dill pickles, it requires careful handling to achieve the perfect texture and flavor. Below are some of the most common mistakes people make and how you can avoid them for a foolproof baking experience.
Using Hot Pickle Juice Instead of Warm
One of the most common pitfalls is overheating the pickle juice. Yeast is sensitive to temperature—if the liquid is too hot, it kills the yeast, and the dough won’t rise. Always ensure your pickle juice is warm (around 105°F–110°F), not boiling.
Adding Too Many Pickles
While it may be tempting to add extra chopped pickles for more tang, going overboard can overload the dough with moisture. This often leads to soggy or dense bread. Stick to the measured amount in the recipe and fold them in gently.
Skipping the First Rise
Patience is key in bread making. Skipping or shortening the first rise results in a flat loaf with poor texture. Allow the dough enough time to double in size, usually about one to one and a half hours, depending on room temperature.
Over-Kneading the Dough
Kneading develops gluten, which gives bread structure, but too much kneading can make dill pickle bread tough instead of soft. Aim for smooth, elastic dough, then stop. Overworking the dough can also cause the pickles to break apart and release too much liquid.
Cutting Into the Bread Too Soon
Freshly baked bread smells irresistible, but slicing before it cools leads to squashed, gummy slices. Allow the bread to rest on a wire rack until it reaches room temperature for clean, flavorful slices.
Storing Incorrectly
Because the dill pickle bread recipe has a higher moisture content, improper storage can make it spoil faster. Wrapping warm bread, refrigerating it, or leaving it uncovered will shorten its freshness. Always cool completely, then store in an airtight container at room temperature or freeze for longer storage.
Pairing Dill Pickle Bread with Meals
One of the best things about the dill pickle bread recipe is how versatile it is. With its tangy, savory notes and soft, fluffy crumb, this bread doesn’t just stand alone—it shines when paired with the right meals. Whether you’re serving it as part of a family dinner, a casual lunch, or even a holiday spread, dill pickle bread can add a flavorful twist to any menu.
With Soups and Stews
The bold, briny flavor of dill pickle bread makes it a natural partner for hearty soups and stews. A steaming bowl of tomato soup, beef stew, or creamy potato soup pairs beautifully with a slice of this bread, balancing rich flavors with a refreshing tang. Try toasting it lightly and adding a smear of butter for an irresistible side.
Perfect for Sandwiches
Because of its soft texture and zesty undertones, dill pickle bread makes a fantastic base for sandwiches. Use it for classic deli combinations like turkey and Swiss, ham and cheddar, or roast beef with horseradish. The bread already carries pickle flavor, so you don’t need to add extra pickles unless you want an extra crunch.
As a Party Appetizer
The dill pickle bread recipe also works beautifully for party platters. Slice it into thin pieces and serve with dips like spinach-artichoke, hummus, or ranch. It can even be transformed into crostini by toasting slices and topping them with cream cheese, smoked salmon, or fresh veggies. This makes it a hit at gatherings and potlucks.
Alongside Grilled Meats
Dill pickle bread holds its own against smoky, savory flavors. Serve it with grilled chicken, steak, or barbecue ribs, and you’ll notice how the tangy bread balances the richness of the meat. For summer cookouts, this bread can easily replace standard dinner rolls as a unique side.
Breakfast and Brunch Ideas
Believe it or not, the dill pickle bread recipe isn’t just for lunch and dinner. It can be incorporated into breakfast and brunch menus too. Toasted slices with scrambled eggs, omelets, or avocado spread make a refreshing start to the day. You can also serve it with cream cheese and lox for a gourmet-style brunch option.
FAQs About Dill Pickle Bread Recipe
1. Can I use any type of pickles for this recipe?
Yes! Dill pickles bring the classic tangy flavor, but you can try bread-and-butter pickles for sweetness or spicy pickles for heat. Each type changes the taste slightly, so experiment with your favorite style for a fun twist.
2. What’s the best cheese to add?
Sharp cheddar is a perfect match for dill pickle bread, adding bold flavor. You can also use mozzarella for mild creaminess, pepper jack for spice, or Swiss for a nutty bite. Each cheese creates a unique balance with the pickles in the bread.
3. Can I make this bread without yeast?
Yes, you can swap yeast for baking powder to make a quick bread version. It won’t rise as high as yeast bread and will have a denser crumb, but it still delivers great pickle flavor. This is perfect if you want a faster, no-rise recipe.
4. Is pickle juice necessary?
Pickle juice adds the bread’s signature tang and enhances the dill flavor. If you’re short, mix warm water with a splash of vinegar or use more chopped pickles for extra taste. While optional, it makes a big difference in flavor depth.
5. Can I make it vegan?
Definitely! Replace butter with plant-based margarine or oil, and ensure the pickles you use don’t contain animal-based ingredients. Vegan cheese shreds or nutritional yeast can also be added to keep the cheesy flavor completely dairy-free.
6. How do I prevent my bread from being soggy?
Drain the chopped pickles well and pat them dry before adding to the dough. Too much moisture can make the loaf heavy or soggy. Using less liquid in the batter and baking until golden helps ensure a firm, fluffy bread every time.
Related Posts
https://dailytastebites.com/cucumber-ranch-crack-salad-recipe/
https://dailytastebites.com/roasted-garlic-mushrooms-recipe/
Conclusion
The dill pickle bread recipe is a delightful twist on classic bread baking. With its tangy pickle bursts, fragrant dill, and customizable add-ins, it’s a bread that excites the palate and surprises anyone who tries it. Whether you serve it as a side, make it the centerpiece of your meal, or bring it to a gathering, this bread is sure to leave a lasting impression.
So next time you’re craving something different, skip the ordinary loaf and give dill pickle bread a try. It might just become a family favorite in your kitchen!
For more on baking with unique ingredients, check out King Arthur Baking for tips and inspiration.
Print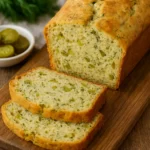
Dill Pickle Bread Recipe
- Prep Time: 20 minutes
- Rising Time: 1–1.5 hours
- Cook Time: 40 minutes
- Total Time: About 2.5 hours
- Yield: 10 slices 1x
- Category: Side Dish
- Method: Baking
- Cuisine: American
Description
This tangy and savory bread uses chopped dill pickles, pickle juice, and fresh dill to create a loaf with bold flavor and a soft texture. Perfect for sandwiches, toasts, or served as a side with soups and salads.
Ingredients
- 3 cups all-purpose flour (or mix with 1 cup whole wheat flour)
- 1 packet (2 ¼ tsp) active dry yeast
- ¾ cup warm pickle juice (105°F–110°F)
- ¼ cup warm water
- 2 tbsp sugar
- 2 tbsp unsalted butter, melted
- ½ cup chopped dill pickles (drained)
- 2 tbsp fresh dill (or 1 tbsp dried dill)
- 1 tsp garlic powder (optional)
- 1 tsp onion powder (optional)
- 1 tsp salt
Instructions
- In a small bowl, combine warm water, sugar, and yeast. Let it sit for 5–10 minutes until foamy.
- In a large mixing bowl, add flour, salt, and dried seasonings (if using).
- Stir in the yeast mixture, warm pickle juice, melted butter, and chopped pickles. Mix until dough forms.
- Knead on a floured surface for 8–10 minutes until smooth and elastic.
- Place dough in a greased bowl, cover, and let rise for 1–1.5 hours until doubled in size.
- Punch down dough and shape into a loaf. Place in a greased loaf pan.
- Cover and let rise for another 30 minutes.
- Bake at 375°F (190°C) for 35–40 minutes, until golden brown and hollow-sounding when tapped.
- Remove from oven, cool on a wire rack before slicing.
Notes
- Pickle Juice Tip: Make sure the juice is warm, not hot, to avoid killing the yeast.
- Pickle Variety: Kosher dill pickles give the best tangy flavor, but you can experiment with spicy or garlic pickles.
- Storage: Wrap cooled bread in plastic wrap and store at room temperature for up to 3 days. Freeze slices for up to 3 months.
- Serving Ideas: Excellent for grilled cheese, turkey sandwiches, or paired with tomato soup.
- Flavor Boost: Sprinkle sesame seeds or everything bagel seasoning on top before baking for a crunchy crust.
Nutrition
- Serving Size: 1 slice
- Calories: 160kcal
- Sugar: 2g
- Sodium: 280mg
- Fat: 3.5g
- Saturated Fat: 2g
- Unsaturated Fat: 1.3g
- Carbohydrates: 28g
- Fiber: 1.5g
- Protein: 4.5g
- Cholesterol: 10mg